Creating Alexa Skills for IoT and Nodemcu - Part 2 AWS IoT

Connecting Nodemcu to AWS IoT
This is part two of a series of posts showing how I setup a AWS based solution to allow Alexa to read data collected by Nodemcu with DHT temperature and humidity sensors. The design is discussed in part one of this series.Go to Part 1 - Design
Overview
I recommend reviewing my first post in this series, so you can understand the gameplan... but here's the short version. We will create and configure three separate services in AWS. An Alexa Skill for voice commands, a AWS Lambda function that will act as a middle man, and AWS IoT for storing the current state of the Nodemcu sensors.
DISCLAIMER: This guide uses a work around to allow Nodemcu to communicate directly with AWS IoT. The work around uses API keys that will be written in cleartext on the Nodemcu. Proceed at your own discretion.
Goals
- Configure an IoT Thing
- Setup a security policy and user that can write data to the Thing Shadow via the REST API
- Ensure the policy limits access to only one Thing Shadow and is set to write only
- Wire up our Nodemcu and DHT sensor
- Collect sensor data and write it to the Thing Shadow
Prep
Parts and Components
I have linked the tools and components I used to build this project. I personally own each item linked below.
- (1) Nodemcu http://amzn.to/2E8xF7t
- (1) DHT11 http://amzn.to/2nGV1XN or DHT22 http://amzn.to/2C2O47P
- (1) 4.7K - 10K Resistor http://amzn.to/2C4xTH4(only needed if you have a 4 pin DHT sensor)
- Breadboard Jumper Wires http://amzn.to/2nGuYjy
- (1) Breadboard http://amzn.to/2sayXcw (small cheap ones work great for simple experiments with Nodemcu)
- USB Micro B cable http://amzn.to/2BMAj1h (the same that a android phone uses)
- USB Power Adapter http://amzn.to/2C2sXCw
Tools
- Arduino IDE
- Some good music
AWS
I considered showing how to setup the appropriate accounts on AWS, but it seems there are plenty of good resources to show how to do that. Put your google-fu skills to work or take a wild stab at it.
- Create an AWS Account
AWS IoT is free for 12 months at 250K messages a month.
Steps - AWS IoT
AWS IoT refers to devices as Things. We will setup our Nodemcu with DHT11/22 as a Thing within AWS IoT.
- Login to the AWS Console > Select US East (N. Virginia)
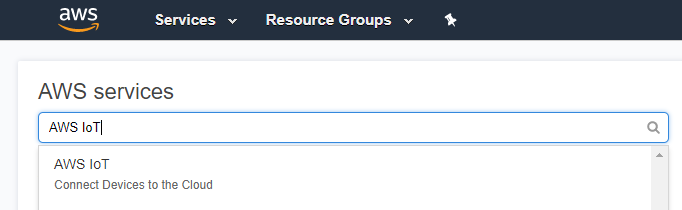
- Search AWS IoT > Select AWS IoT
- Select Manage > Things > Create > Create a single thing


- Enter device information > Next
- I am sticking to the bare minimum for this guide, so I will enter a name only
- Type allows you to assign a template that includes attributes specific to your device
- Groups are for easier management of your devices
- Create thing without certificate
- Remember we will be using the AWS IoT SDK to establish connectivity because the Nodemcu does not support TLS 1.2
- The more robust approach would be to put a IoT hub/broker into the solution.
- You can select the Thing from the Manage > Things pane. From here you can view things such are the Amazon Resource Name and Shadow state.

- Leave you web browser tab open, because we will be coming back to AWS IoT in future steps.
Steps - Setup Access Controls
What we need to do here is create a API user and security profile that will allow the Nodemcu to connect to IoT, update the Thing Shadow, and have the ability to do nothing else.
Creat the Security Policy
- Use the same method you found AWS IoT to find and access AWS IAM
- Select Policies > Create Policy
- In the visual editor
- Choose a service > Search IoT > Select IoT
- Actions > Search Shadow > Select UpdateThingShadow
- Resources > Specific > Add ARN > and paste the ARN for the Thing as shown in the screen host above > Add > Review Policy
- Name the Policy > Create the Policy
- Because this policy is for a one to one relationship I make the name very explicit such as "node_office_UpdateThingShadow"
Create the User
- From the main console page of IAM, Select Users > Add User
- Enter a name that your Nodemcu will use > Select Programmatic sccess > Next Permissions
- Select Attach existing policies directly > Search the Policy name you created above and Select it > Next Review > Create User
- Now you need to make note of the Access key ID and Secret access key

You can always come back to grab the key info again.
Alrighty! Our IoT Thing Shadow is ready and we have an API user that can write data to that Shadow. Let's get the Nodemcu wired up and programmed so we can see a result.
Steps - Setup the Nodemcu with DHT Sensor
- Wire up the Nodemcu and DHT sensor
Here is a diagram of the physical wiring. Omit the 4.7K - 10K resistor if you have a 3 pin DHT. The small breadboards I linked above will fit the Nodemcu and a couple sensors perfectly.They also have double-sided tape for mounting your experiments easily.

Steps - Setup Arduino
These steps require ESP8266 2.3.0 library to be installed in Arduino. You can review those steps in my blog post Hacking the Sonoff Wifi Switch - Part 2.
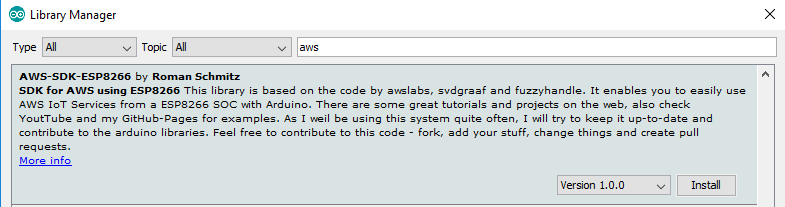
- Open Arduino > Sketch > Include Library > Manage Libraries
- Search and install "AWS-SDK-ESP8266"
- There is more info available on Roman Schmitz github page
- Search and install "DHT sensor library" by Adafruit
- I have not yet tried the "DHT sensor library for ESPx" if you have used it drop me a comment.


We are ready to review the code and program the Nodemcu.
Code
Credit goes to Roman Schmitz for the orignal AWS code example. I have just modified it to take DHT data and send it to the IoT in the correct JSON format.
Also I want to say thanks to the esp8266 library team. The dateTimeProvider and httpClient functions are saving me a lot of lines of code.
ONE LAST MENTION ABOUT SECURITY: It is not a good idea to include keys, secrets, or passwords directly in code. While there are some ways to store credentials outside of the main body of this sketch it won't fix the issue that all the sensitive data will be placed in cleartext on the Nodemcu. Mongoose OS features flash encryption, but I havent tried it out on a Nodemcu yet.
You will need the following info to use this sketch:
- Thing HTTPS API endpoint
- Manage > Things > your_thing > Interact
- Thing Shadow path in the format "/things/your_thing/shadow"
- AWS API Key ID
- AWS API Secret Key
What are we doing here?
This sketch will connect your Nodemcu to your wifi network, configure the AWS client, collect the current temperature and humidity, and write that to the Thing Shadow in IoT. This is repeated every 60000 milliseconds or 60 seconds.
You can change the delay to suit your needs (especially during testing), but before you change the delay you should calculate the how many connections your device(s) will be making to IoT. 250K messages per month is the magic number.
#include <ESP8266WiFi.h>
#include <AmazonIOTClient.h>
#include <ESP8266AWSImplementations.h>
#include <AWSFoundationalTypes.h>
#include <DHT.h>

Esp8266HttpClient httpClient;
Esp8266DateTimeProvider dateTimeProvider;

AmazonIOTClient iotClient;
ActionError actionError;

// DHT Sensor setup
#define DHTPIN D1
#define DHTTYPE DHT22
DHT dht(DHTPIN, DHTTYPE);

char *ssid="YOUR SSID";
char *password="YOUR PASSWORD";

void setup() {
  Serial.begin(115200);
  delay(10);

  // LED on nodemcu
  pinMode(BUILTIN_LED, OUTPUT);

  // DHT Sensor
  dht.begin();

  // Connect to WAP
  Serial.print("Connecting to ");
  Serial.println(ssid);
  WiFi.begin(ssid, password);

  while (WiFi.status() != WL_CONNECTED) {
    delay(500);
    Serial.print(".");
  }

  Serial.println("");
  Serial.println("WiFi connected");
  Serial.println("IP address: ");
  Serial.println(WiFi.localIP());

  iotClient.setAWSRegion("us-east-1");
  iotClient.setAWSEndpoint("amazonaws.com");
  iotClient.setAWSDomain("YOUR REST THING API ENDPOINT");
  iotClient.setAWSPath("YOUR THING SHADOW PATH");
  iotClient.setAWSKeyID("YOUR ACCESS KEY ID");
  iotClient.setAWSSecretKey("YOUR SECRET ACCESS KEY");
  iotClient.setHttpClient(&httpClient);
  iotClient.setDateTimeProvider(&dateTimeProvider);
}

void loop(){
  float t = dht.readTemperature(true);
  char temp[10];
  dtostrf(t,1,2,temp);

  float h = dht.readHumidity();
  char hum[10];
  dtostrf(h,1,2,hum);

  MinimalString shadow = ("{\"state\":{\"reported\":{\"temperature\":" + String(temp) + ",\"humidity\":" + String(hum) + "}}}").c_str();

  char* result = iotClient.update_shadow(shadow, actionError);
  Serial.print(result);

  delay(60000);
}
Steps - Program the Nodemcu
- In Arduino, insert the sketch code and input your wifi creds and api keys
- Nodemcu programming settings are as follows
- Board NodeMCU 1.0 (ESP-12E Module)
- I use all other defaults
- Of course make sure your COM is set
- Open Serial Monitor on your COM
- Upload the code
- Watch serial monitor for a minute and make sure it is outputting as expected.
- Disconnect the Nodemcu from power and reconnect
Program Result
If things go well you will see the Nodemcu connect to your wifi and output its IP. Then it will show the connections it is making to AWS IoT.
Result
Now if everything is working as expected we will see the Thing Shadow being updated.
- Navigate back to AWS IoT > Manage > Things > Your Thing > Shadow
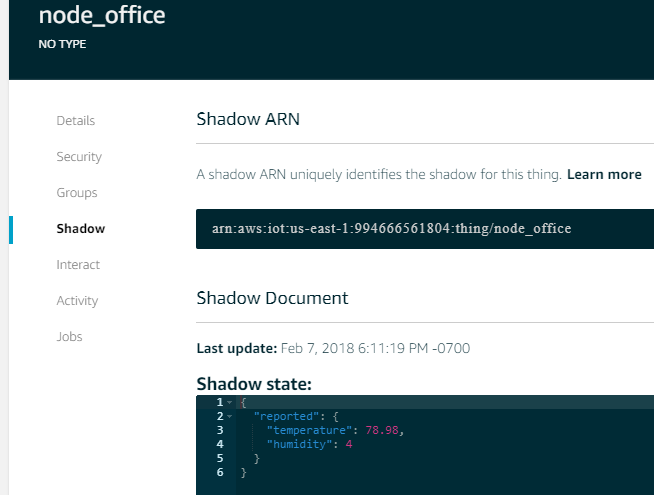
Coolio. We are so totally going to make this work.
Next Steps
In the next post we will cap things off by creating a way for Alexa to read these values to us. If you want to see the whole concept and design diagram check out part one of this series.


The sample code for the ESP runs briefly then says: "can't setup SSL connection" then a stack trace...repeat...
ReplyDeleteAny thoughts?
It sounds like your authentication to AWS IoT is failing. Double check the values in the "iotClient" section of the sketch. Also verify your security policy in IAM.
DeleteHi Dan.
DeleteI don't see anything wrong in the AWS section:
IotClient.setAWSRegion("us-east-1");
iotClient.setAWSEndpoint("amazonaws.com");
iotClient.setAWSDomain("arn:aws:iot:us-east-1:123456789059:thing/mything");
iotClient.setAWSPath("/things/mything/shadow/");
iotClient.setAWSKeyID("ACDEFGHIJKLMNOPQRST");
iotClient.setAWSSecretKey("1o2o3o4o5o6o7o8o9o1o2G+sK5OSme6P3tsSPI");
iotClient.setHttpClient(&httpClient);
iotClient.setDateTimeProvider(&dateTimeProvider);
Could I have an old library? Where did you get your AWS and AmazonIOTClient files from?
The security policy looks the same as you instructed (but hard to tell exactly).
Thanks.
"iotClient.setAWSDomain("arn:aws:iot:us-east1:123456789059:thing/mything");"
DeleteChange the ARN to the API Endpoint for the Thing:
Go to your Thing in IoT > Manage > Things > your_thing > Interact
There should be a HTTPS Endpoint. Copy and replace your ARN above.
Thanks Dan. That got rid of the SSL error but I don't see the shadow updating and I still get a stack trace dump after the second connect. Screen looks like this:
Deletea3vdyjzlnwxobi.iot.us-east-1.amazonaws.com
443
POST /things/mything/shadow/ HTTP/1.1
Content-Type: application/json
Connection: close
Content-Length: 55
Host: xxxxxxxxxxxxxxxx.iot.us-east-1.amazonaws.com
x-amz-content-sha256: bdb51165355e3b0891aad7a217b3aa5749df14a0c02646a05bd47b0044c1b012
x-amz-date: 20180215T200125Z
Authorization: AWS4-HMAC-SHA256 Credential=ABCD...............EFGH/20180215/us-east-1/iotdata/aws4_request,SignedHeaders=content-type;host;x-amz-content-sha256;x-amz-date,Signature=c1ac10a3b64453e45678901254b26c424d6c73e17ce2f74346108559ab7e100f
{"state":{"reported":{"temperature":66,"humidity":35}}}
I hard coded the temp and hum variables just to try the sketch.
Exception (29):
epc1=0x4010443e epc2=0x00000000 epc3=0x00000000 excvaddr=0x00000000 depc=0x00000000
ctx: cont
sp: 3fff0610 end: 3fff0b60 offset: 01a0
Could my libraries be different than yours?
Bob
FYI - I got my libraries from:
ReplyDeletehttps://github.com/fuzzyhandle/aws-sdk-arduino-esp8266
Could be library related. I am using https://github.com/Schm1tz1/aws-sdk-arduino-esp8266
DeleteAlso as noted in my steps use ESP8266 library 2.3.0. Version 2.4.0 was giving me issues with aws-sdk-arduino-esp8266 and some other libs.
I tried going back to 2.3 but the stack trace remained. I believe my library is now the same as yours. It appears to run for one to to cycles but nothing shows up on the shadow. Still working it although it will be a couple of days before I can get back to it.
DeleteThanks for the help.
This comment has been removed by the author.
DeleteDan,
ReplyDeleteI got rid of the stack dump y reloading https://github.com/Schm1tz1/aws-sdk-arduino-esp8266 which is 10 commits ahead offuzzyhandle and had an update to AWSClient4 for buffer overflow.
So now it runs fine on the ESP8266 but I do not see updates to my thing shadow when I navigate to my "thing" shadow page. I get no errors on the connection even when I set debug to SSL+(everything there). ANy ideas how to troubleshoot are welcome. In the mean time I am going to create another "thing" and put it all in the sketch to see if it is in the thing or the sketch.
I got the same problem, ESP8266 connect with AWS, but when navigate to Manage -> Things -> Your Thing -> Shadow didn't be updated. I Saw in AWS IoT Monitor that ESP8266 did the connection successfully, however it didn't publish anything.
ReplyDeleteyes Ayrton. Same thing. I can see that it does connect but nothing happens to the shadow. I have a feeling that AWS IoT has changed since this example and something else is needed that is not explained here. Unfortunately, AWS monitoring tools are terrible. Cloudwatch gives another way to monitor, but there is no telling if there was an error or what the request is actually doing. I also believe that the library used here has changed and depending where you et it will depend on our success.
DeleteFor example, the Schm1tz1 version mentioned above had a buffer overflow problem in Client4.cpp. There are other changes but there is no way that I can see to instrument the process through the library. Turning on debug in Arduino does not show any errors.
I will take a look at my setup to see if we can identify the discrepancy. Everything is still working for me.
DeleteOutstanding article. The only snags I hit were:
Delete1. Not paying careful enough attention to the versions of various libraries and drivers.
2. Somehow I got through it without assigning permissions to my IOT user.
Now it's working fine!
Thank you very much!!! Now on to part 3!
Hey Need to clarify some doubt like I have code for one of my wireless sensor but there is no library available in arduino then
ReplyDeleteHow can I be able to integrate the code so that it will work with AWS platform ?
for the reference this is my code
https://github.com/ControlEverythingCommunity/SHT25/blob/master/Arduino/SHT25.ino
and want to use it with ESP8266 and AWS IOT client would it be possible to use ?
Thanks for the article and am keen to see part 3 :-) I've had no problem in connecting my esp8266 nodeMCU to AWS; albeit it took me too long to discover that there should not be a trailing '/' in the config:
ReplyDeleteiotClient.setAWSPath("/things/mything/shadow/");
should be:
iotClient.setAWSPath("/things/mything/shadow");
Having said that, my implementation is also not stable using the libraries as suggested (version 2.3.0 and https://github.com/Schm1tz1/aws-sdk-arduino-esp8266). I've even used the AWS-SDK example code which failed after about 10 mins.